Accessory: Comme Des Garcons black and white polka dot pouch. Same techniques as for all other garments.
Knitwear: Enlarge image of knit. Trace pattern of knit with pen tool. Make/Create as a swatch, and drop in the swatches tool bar. Create outline of garment, and close up. Fill with swatch. Don't worry about track marks too much for this assessment.

Friday, 7 September 2012
Friday, 31 August 2012
Week 5 - Jackets
Task: Sass& Bide's The Little Prince Jacket
Different Challenge: Detailing - Created small buttons with 'circle' tool, which is underneath the rectangle tool. Top stitching with a dashed line.
FRONT SIDE AND BACK created drape lines to give garment movement.
Different Challenge: Detailing - Created small buttons with 'circle' tool, which is underneath the rectangle tool. Top stitching with a dashed line.
FRONT SIDE AND BACK created drape lines to give garment movement.
Tuesday, 21 August 2012
Week 4 - Striped Shirt
PATTERNS: To create a pattern it is important that YOUR OUTLINE IS COMPLETELY JOINED TOGETHER.
- Object>Path>Average>Command J (after you have selected the direct select tool (the white arrow head) and dragged a box/highlighted ONLY the TWO points you wish to connect/join up.
Create your pattern. (Black arrow head) Select a square of this pattern and drag it into/drop it into the 'swatches' tab on the RHS. There is should pop up as a swatch. Highlight your garment's outline, and double click swatch. This should fill your garment with chosen pattern/colour.
Sunday, 19 August 2012
Week 3 - Skirts and Dresses
Task: Sketch a skirt and dress - chose to do Sass and Bide's The Never Was dress and Zimmerman's silk skater skirt.
Difficulty: Flowy drape. First draw the curve, and from there draw the vertical straight drape lines to imply drape and flow of the material. Remember that this is 3D and the fabric folds back on its self/see both top and underneath of fabric.
Difficulty: Flowy drape. First draw the curve, and from there draw the vertical straight drape lines to imply drape and flow of the material. Remember that this is 3D and the fabric folds back on its self/see both top and underneath of fabric.
Friday, 10 August 2012
Week 2 - SHORTS AND PANTS SKETCHES
Shorts & Pants: Chose to do Bec and Bridge's Suedette Shortie and Positano Wide Leg Pant.
Tip: Draw one side of sketch FIRST and then Right Click>Transform>Reflect>COPY OR CTRL C> CTRL V>Transform>Reflect.
This creates a symmetrical result! Necessary for tech sketches unless design is asymmetrical!
Top Stitching: Draw a line. Go to 'Stroke' tab on the RHS and 'tick' the 'Dash Line' box. Can change the width and length of the dotted line to fit/immitate any aspect of a garment, whether it is top stitching/understitching/zipper etc...
Thursday, 2 August 2012
Week 1 - INTRO INTO ADOBE ILLUSTRATOR!
Task: Befriending the 'pen tool' (Symbol: Ball Point ink pen on LHS)
By clicking the mouse, you release an 'anchor point'. Create straight and curvy lines with this tool. Curved: Click, hold and drag in any direction to curve the line appropriately.
Outline the body template for HW:
.jpg)
Note: Easier to find garments and trace those firstly, or draw straight onto the body.
Sunday, 10 June 2012
Week 11 - File Set Up (Fabric Feelers & A3 Boards)
File> New> International Paper> A3> 426x303> Custom> Open
Bleed:
View> Rulers or Command>R
Drag from the left and top ruler bars, 3mm in from all sides. This space between the edge of the paper and the blue line is called the bleed area, the area you know will be cut off.
Fabric Feelers (A5)
106mm x 156 mm For bleed 3mm around the entire rectangle.
Transferring into Illustrator:
- Save file as a working file (all layers)
- Save as a flattened (make sure you rasterise all text layers) and change psd to a tiff.
- Open in Illustrator (the tiff version).
- File> save as> -name-> Drop down bar click> change to pdf.> save.
- Make sure you have all the right settings for 'markings' so that when printed you have a boarder and your cutting markings.
Week 9 - Rendering & Cleaning Up

Cleaned Up Version of a DDS.
Magic Wand Tool> Contiguous off> select White> Paint Bucket White> Magic Wand Tool> Select Black> Paint Bucket Black> and done!

Pants filled with my leaf pattern (mirror repeat).
Control T> Warp - then adjust till satisfied!
Saturday, 19 May 2012
Week 10 - Rendering the Body

Rendered Body using 'Dodge' and 'Burn'.
Make to have a layer of the 'outline' separate to the 'skin'.

The rendering of the body is not smooth. But with practice I should be able to execute the 'looks' I want. Make sure to remember to 'make new layer' whenever you are adding another pattern/colour/rendering to your drawing.
Monday, 30 April 2012
Half Drop Repeat & Final Textile Pattern (Block Pattern)
SPICE, KICK & POP
Following the online tutorial (UTSOnline - DFC Folder), I found that although the concept of a Half Drop Repeat Pattern seems simple, this pattern was time consuming in the attempts to achieve no seam lines, and achieve fluidity.

And FIN! :)
I also practiced creating a simple block repeat due to my absence in Week 7.

I also practiced creating a simple block repeat due to my absence in Week 7.

Designed the chilli pattern on top of my background, defined pattern and then filled a square with my pattern. And Done!! Block Repeat Pattern :)
Motif for Half Drop Repeat Pattern
MOTIF
I wanted to mainly use the chillies and perhaps a leaf or two in my motif. These are the main parts of the plant, which i found to be the most attractive and interesting.

The motifs on the right have been adjusted, in hue and saturation. This change in colour I think brings out the chillies, like a pop of colour you see in the midst of green leaves. I extracted these images using the magnetic tool, direct from my photos.
Background Pattern for Assignment 2
BACKGROUND
For the background I chose to 'define pattern' and 'fill' the page with a mirror repeat pattern from the most common part of the Chilli Plant, the leaf. I chose a rectangle from my images, adjusted the hue and saturation to brighten/spice up the colour scheme.

After manually creating a mirror repeat, I selected a square, defined pattern, and filled the page and ended up with the above pattern. I chose this for the background as it seemed less dominating than the second pattern.

After many tries, I managed to form this second pattern, though the darker green 'striped' sections stood out too much, this pattern almost becoming too dominant. Hence my choice for the first pattern.

This third pattern, although i find interesting and like, to me it loses the 'leaf veiny' look. Distorted so much that it becomes an interesting pattern.
Sunday, 29 April 2012
Spice and Kick!


I like the vibrancy of the chilli's colour, the different shades of red and green bursting through the dense ever green leaves.
I like the shapes of the leaves, with the symmetrical veins, beginning from the centre out, similarly as to how the plant grows.
I like the repetition of the leaves down the stems, the chilli growing, sprouting from the centre growing upwards.

When i spotted this little white flower hidden amongst the bright and dominant leaves and chilli i thought it special. It was a minuscule delicate white flower. Like a hidden secret.

Shape and colour of this leaf formation, I like. Forms an overall (leafy) silhouette.

Another photo of the nearly hidden green chillies , like a subtle surprise, a kick/spice within the plant.

Burst of vibrant red, contrast to the deep green.
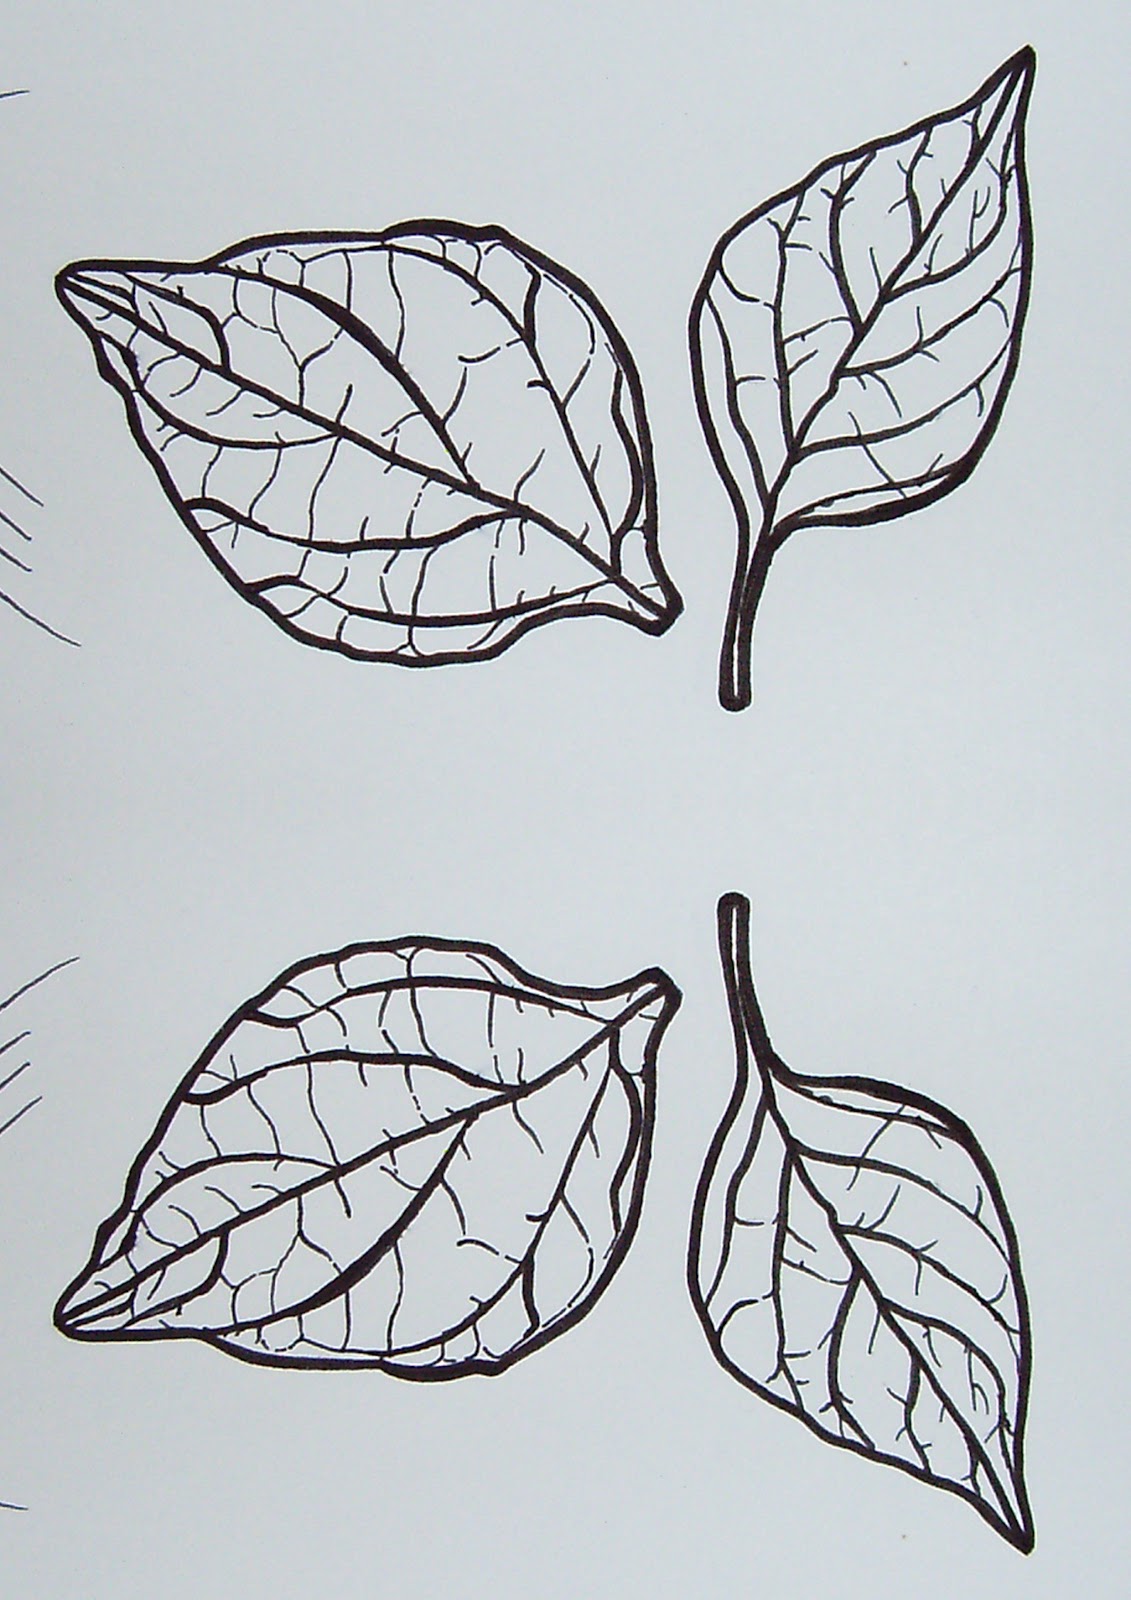
These are a couple of the sketches of the leaves i did. The one to the left has much less detail whereas the above sketch has intricate vein detail.

Using different thickness of inks (when inking the sketches), I applied my knowledge of technical sketches to these. I like the way the thickness and lines of the veins/leaf undulates.
Week 7 Textile Repeats
REPEAT SYSTEMS IN PHOTOSHOP
Although I was away for this lesson, I attempted to create a Toss Repeat Pattern, Half Drop Repeat Pattern and a Full Drop Repeat Pattern on photoshop.
TOSS REPEAT PATTERN IN PHOTOSHOP
1. Open up your motif in photoshop. Then go to Select> All> Edit> Copy.
2. Open up a new square document. Go to View> Snap to> Layers> View> Snap to> All. (to flatten)
3. Go to View> Rulers and drag your cursor from the horizontal and vertical ruler until they snap to centre giving you a guide to work with. (Four square divisions)
4. Using one of the four sections go to Edit> Paste. Arrange your motif so that it touches the top left hand corner of your chosen square. Edit> Transform> Flip Vertical. Place this part in the bottom right hand corner.
5. Do the same for the top right but flip the image horizontally. Edit> Transform> Flip Horizontal.
6. begin to add in the motif but changing the size and positioning using Edit> Free Transform. Toss these about the square.
7. Using the Rectangular Marquee Tool select that square. Edit> Define Pattern> OK.
8. Open a new document. Go to Edit> Fill. Find your new pattern and select OK. 9.Retouching needs to be done using the 'Spot Healing Brush Tool' by dragging the brush in a zig-zag style across the lines. Or You can use the stamp tool by holding down alt and clicking over the line to conceal the track marks.

Example of Toss Repeat!
HALF DROP REPEAT PATTERN IN PHOTOSHOP
1. Open up your motif in photoshop. Go to Select> ALL. Edit> Copy
2. Go to Image> Image size. Take down the pixel measurements for accuracy and success.
3. Go to Filter> Other> Offset. Make sure that the Wrap around is selected. Divide the vertical pixel image size by two and change the horizontal to 0. Click OK.
4. Go to Image> Canvas size and change to percent then click the middle box on the left hand size. Change the Width to 200% and leave the Height as 100%.
5. Go to Edit> Paste (original image you first copied) and move the image directly to the right of the first. Flatten the image.
7. Open a new document. Edit> Fill. Find your new pattern and select OK.
6. Select> All> Edit> Define Pattern> OK.

Example of Half Drop Repeat!
FULL DROP REPEATS IN PHOTOSHOP1. Open up your motif in photoshop.
2. Go to Image> Image size and take down the pixel measurements for accuracy and no seam lines.
3. Go to Filter> Other> Offset and divide the horizontal and vertical pixel images sizes by two and enter the new values. Click OK.4. Fix any track marks by using the 'Spot Healing Brush Tool', dragging the brush in a zig-zag style across the lines. Otherwise you can use the stamp tool by holding down 'alt' and clicking over the line to conceal the seam line (break).
5. Go to Select> All> Edit> Define Pattern> OK.
6. Open a new document in photoshop and go to Edit> Fill. Find your new pattern and select OK.

And DONE!
Week 6 - Repeat Patterns I Created!

Stripe Repeat Pattern
1. Use the rectangle tool to create your desired stripes (vertical).
2. Select the 'move' tool (arrow) and hold down the 'alt' button whilst clicking and dragging your stripe design across the page. This is an easier/faster way to repeat your striped pattern.
3. You can apply this 'short cut' to any amount of stripes, you do not have to fill the page.
4. Using the rectangle marquee tool, select a horizontal section of your striped pattern.
5. To 'define your pattern', go to Edit, "Define Pattern" - name it and press OK.
6. Open up a new page/blank space or area where you want your pattern to fill/be. To achieve this go to Edit, Fill, click on the drop down bar 'Use' to choose your pattern, then Custom Pattern where your selected new pattern should be available. Select your pattern then click "OK".
7. Your entire space should be filled with your stripe repeat pattern.

Mirror Repeat System
1. Using the paint bucket icon, fill the background with one colour.
2. Download a brush (stroke/watercolour) from brusheezey.
3. Make a new layer. In a different colour (complementary/contrasting) place one or a few strokes in the top left hand corner.
4. Duplicate layer, the free transform/transform and flip it horizontally, creating a mirrored effect.
5. Merge layer. Repeat the transformation, but instead of flipping this newly merged layer horizontally, flip it vertically to create a mirrored effect again.
6. Merge layers again and duplicate this design again by flipping it either horizontally or vertically in a way that allows for no visible division lines to be seen.
7. Select an area (square/rectangle) of your pattern with the rectangle marquee tool. Go to 'Edit', 'Define Pattern', Name it and press 'OK'.
8. Open a new blank page, and fill the area with your new pattern. Edit, Fill, Use, Pattern, select your Custom Pattern.

Doing the steps above I achieved this pattern.

Selecting a different section of my original pattern i was able to create a different pattern once again.

Once again, a different pattern merely by selecting a differing section of my original pattern.
Tuesday, 17 April 2012
Week 7 - Repeat Pattern Systems on Photoshop
PRACTICING REPEAT SYSTEMS ON PHOTOSHOP
Although I was away this week for the practice of repeat systems, my understanding of each system, visually and theoretically allowed me not to fall behind.
Following through the Photoshop Tutorials posted up on UTSOnline, I was successful in my attempts of a Simple Block Repeat and a Simple Half Drop Repeat.
I had some issues with the seamlessness in the Half Drop Repeat Patterns, though I know that my errors were due to simple mathematical errors, in the measurements of the motif, and the 'filling' in of a blank page. These mistakes are easily reversed.
Sunday, 8 April 2012
Week 6 - Repeat Systems
Repeat Systems
Half Drop

Sweet Art by Sarah Sweet - 2011 - Retro Spring Flowers - Viewed 21/04/12 - <http://sweets-art.blogspot.com.au/>
Brick

Artlandia - 2012 - 'Creating Half-Drop and Brick Repeats' - Viewed 19/04/12
<http://www.artlandia.com/products/SymmetryWorks/tutorials/lesson3/page2.html>
Stripe

Heather Roth Style - 2011 - 'Line 4: Grassy Stripe' - Viewed 19/04/12 - <http://heatherrothstyle.blogspot.com.au/2011/05/line-4-grassy-stripe.html>
Spot Repeat

Artlandia - 2012 - 'Example(s) of Spot Repeat' - Viewed 19/04/12 - <http://www.artlandia.com/wonderland/glossary/SpotRepeat.html>
Diamond

Dreamstime - 2000-2012 - 'Diamond Vector Repeat Tiled Pattern' - Viewed 19/04/12 - <http://www.dreamstime.com/royalty-free-stock-photography-diamond-vector-repeat-tiled-pattern-image17721587>
Tossed

House of Sienna Mack - Lara Georgine Design Illustration - 2011 - Blue Floral Print - Viewed 21/04/12 - <http://houseofsiennamack.wordpress.com/2011/04/02/meet-larageorgine-our-guest-blogger-of-the-week/>
Ogee

Artlandia - 2012 - 'Example(s) of Ogee Pattern' - Viewed 19/04/12 - <http://www.artlandia.com/wonderland/glossary/OgeePattern.html>
Mirror

'Third Time Around' - 2010 - 'daffodils-mirror-repeat-chris-carter' - Viewed 21/04/12 - <http://chriscarterart.wordpress.com/2010/04/18/mirror-repeat-patterns/daffodils-mirror-repeat-chris-carter/>
Saturday, 7 April 2012
Week 5 - Photoshop Brushes Tutorial
Girl with Watercolour Brushed Hair Tutorial
For my first attempt at this exercise, altering the hue/saturation etc. was simple enough, although when it came to the 'hair' - brush strokes, i did not realise that you only needed to click once, to create each sinuous stroke (not drag and create). The next problem i encountered was that the girl's 'face' was not visible on top of all the brush strokes. I knew that this had to do with the layering (order), so the second time i created this image I managed to achieve a similar result!
- First Attempt -

In the moment I was confused, but after thinking about it i realised my 'Layers' weren't in the right order. I needed to bring up the 'Face' layer (girl's head) right to the top of the list to go on TOP of all the other layers!
Final Product:

Thursday, 5 April 2012
Week 5 - Spray and Splatter Exercise

(The use of the'airbrush tool', downloading and using the 'splatter brush', and extending the canvas size to give a 'spray painted' effect has achieved this visual result on Photoshop.)
Week 5 - Sequin Exercise

(Use of the 'line tool' and creating your own 'brush tool', by downloading/copying and pasting a sequin image from google and creating a new brush - useful for repetitive motifs on garments.)
Thursday, 29 March 2012
Week 4 - Blog Heading
BLOG HEADING - fashion addiction.

I created this blog heading using the watercolour brushes downloaded from 'Brusheezy', along with the other brushes on Photoshop. I downloaded a text font from 'Da Fonts'. Scanned up my sketch of the face and mannequin, then adjusted the hue and saturation, and then added the shading/watercolour brushes to the background and face. Filling in the lips with a bold red. Changed the layerings so that the 'Title-Text' was on top.
Monday, 26 March 2012

Tuesday, 20 March 2012
Week 3 - Photo Montage

(Created with the scanned images, 300 dpi, cut out using complex selection tools.)
Monday, 12 March 2012
Week 2 - Scanning Process & Image Modes
- SCANNING -
How to scan in a UTS computer lab:
1. On the desktop click on the 'Macintosh HD' icon.
2. On the left hand side column click on 'Applications'.
3. Scroll down till you come across a program called 'Hewlett-Packerd' and select.
4. Select 'HPScan'.
5. Choose to scan a 'picture'/image
6. Place your item(s) on the scanner and click 'scan' when you are happy with the object's position etc.
7. Change the resolution of the image (dpi) to the appropriate number, 72-96 dpi for internet/blog posts images, 150-200 dpi for digital/lazer inkjet printers or 300 dpi for commercial printing. For this task change resolution to 300 dpi.
8. Once scanned onto the computer, adjust any setting (saturation/shadows/hue etc.) necessary.
9. Save to the 'Public' folder, in 'D' folder, in 'DFC' folder, in 'S' for Simone Yow - rename files if necessary.
10. Now that it is on the UTS public server, transfer these images to your USB as a back up/portable & transferable file.
- IMAGE MODES -


Tuesday, 6 March 2012
Week 1 - Favourite Blogs
- JAK & JIL -
Entirely visual! So effective i think, insanely engaging with clean edited photos. Photos from all over the world - florence - NYC - Paris - different people, contexts, clothes, colours, but together form a cohesive collection. The content of the photos are of daily activities and actions, incorporating their keen sense of fashion and styling through their subject's fashion ensembles! Love it.
Looking at the blog, the layout is bold, although too wide in my opinion to be entirely effective. The pictures are too small and off to the side with the captions/text running all along the page!
Looking at the blog, the layout is bold, although too wide in my opinion to be entirely effective. The pictures are too small and off to the side with the captions/text running all along the page!
- FASHION DISTRACTION -
This is a very visually engaging blog! Posts consist of images and photos taken of the blogger's interests, experiences, and centred around fashion/design. I like how she transforms and edits her photos to enhance and lock in her audience's interest. The combination of an online store selling the clothes she has incorporated in her blog + the actually blogging of her fashion/style, incorporated into everyday life, sets up a large platform for her followers to connect to and explore/see.
http://www.fashiondistraction.com/
- STREETFSN -
Modern. Hip. Engaging. Innovative. Visually Vibrant!
I like how STREETFSN only uses visual images again, similarly to JAK&JIL - the content is modern, fashion based and stylish, but it also incorporates artistic photos, in-the-moment captures of life and movement. The clarity and focus to detail in all of the photos is intense and effective! This blog is inspirational and bold.
Subscribe to:
Comments (Atom)